12 Jan Design an Amazing Break Dancer in Photoshop
![]()
In this tutorial you can learn how to create an awesome & cool abstract dancer in Photoshop. This tutorial is really helpful for graphics designers to design an advertisement poster or create abstract wallpapers. So why not have a try…
Step 1:
Let’s create the background with width: 1000px x height: 1500px, RGB color and 72dpi. Then double click the little padlock icon to unlock the background layer and click on the (fx) icon in the layers pallet to add a gradient. Use the settings shown bellow.
![]()
![]()
Step 2:
Time to add some texture in our background. Create a new layer and name it texture fx. Go to Filter>Noise>Add Noise, amount 400 px, Distribution Gaussian and check Monochromatic then hit OK. Now go to Filter>Blur>Gaussian Blur 35 px radius, hit OK. Create a layer mask and use a soft light gray brush, layer Opacity 33%.
![]()
Step 3:
Now add more depth. Create a new layer and name it dark ground. Press (G) to select the Gradient Tool, choose Radial Gradient, use the same colors as your background, click in the center of your image and drag up to create the gradient. Press (CTRL+T) and distort your gradient as in the image bellow. Use Burn Tool (O) if you need add more darkness to the ground.
![]()
Step 4:
Create a new layer and name it squares ground, add squares in your ground using custom shapes. Now, (press U) and choose the Custom Shape tool. In the shapes thumbnail choose tile 4 and hold Shift while you drag in your document, then fill your shape with black color.
![]()
Then once again press (ctrl+t) distort/perspective your shape.
When you finish set the layer mode to Overlay, click in the layer mask icon and apply a Linear Gradient (press G) to mask the top side as as shown below.
![]()
Step 5:
Time to add our break dancer, the stock image is from Deposit Photos, you can get it free if you sign up for a trial period. You can get the photo from here. Use the tools in photoshop to crop the image. I use the Pen Tool (P). After you crop it, place it on the center of the canvas and start working on it. Press and hold CTRL and click you thumbnail image to load selection. Now create a new layer and name this layer shadow, fill selection with black color, then press CTRL+T and distort your image like in the image below.
![]()
Apply a Gaussian blur with 35px to radius and hit OK. Click on the layer mask icon to create a layer mask for the shadow layer. Use a soft brush and mask part of the shadow. Now make a smoother shadow by duplicating the shadow layer and apply Filter>Blur>Motion Blur with 0º angle and distance 999px. Use the move tool (V) to correctly position and apply layer mask again to the duplicated layer.
Now let’s fix the shadow of the shoe. Load a new image selection, just hold CTRL and click on the girl dancer thumbnail. Create a new layer and name this layer shoe shadow. Get the brush tool (press B) with a small size soft brush tool with black color and 20% opacity start painting slowly only the bottom side of the shoe as in the image bellow.
![]()
Step 6:
Create another layer above and name it abstract lines. Now (press L), choose Polygonal Lasso tool and start creating some shapes as you wish. Feel free to create your own shapes but you can use the images examples. So, with the Polygonal Lasso tool start creating the first shape. Take a sample of the color of pants when you finish the shape and fill the selection made with that color.
![]()
You can rotate or re-size the shape if you want to a better result, just press (ctrl+t). Finally (press Ctrl+G) and group this shapes together.
![]()
Step 7:
Make one more layer below the abstract lines layer. Name this layer splatters, download any splatter brush pack. Use the cut and paste technique to create this simple effect. In your new layer paint with your brush anywhere, after that, hold (ctrl) and click in the splatter thumbnail to create a selection and disable the visibility of the layer (click in the small eye icon).
Now move this selection over the pants and(press ctrl+c) to cut and (ctrl+v) to paste. Use the same process to create more splatter effects .Use different splatter brush and at the end delete the original splatter layers with the visibility off. Now press (ctrl+G) group this layers together one more time.
![]()
Step 8:
This is an easy step. Create a new layer above the splatters, name it lights and with a soft round brush with white color and200px paint in the same area like in the bellow.
![]()
Now, create another layer paint again with blue color (0ba0a9), 400px over the white color and change layer mode to Linear Dodge. You can use more lights effects in others areas if you wish.
![]()
Step 9:
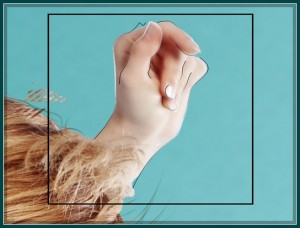
Easy step too. Create a new layer below the lights layer. All you need is the Pen Tool (P) and a little patience here. With pen tool star make some lines in the hair like image bellow.
![]()
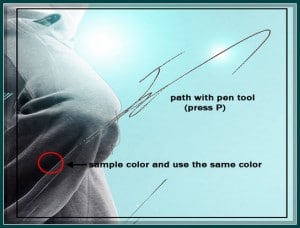
Select brush tool (B), and select a hard round brush with 2px or 3px, now (press P) again to select the Pen Tool and with the path active right click, select Stroke Path with Simulate Pressure, hit OK.

Step 10:
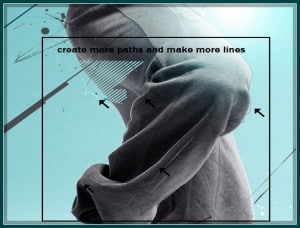
Create a new layer below line fxs layer. Choose Brush Tool (B) with different sizes brush use a hard round brush between 3px and 15px and open the brush panel. Follow the settings shown bellow. Brush type shape: Spacing 500px, Shape dynamics: Size Jitter 100% and Minimum Diameter 13px, Scattering: scatter check both axes, 1000% and count 1.Take a sample color of the clothes and start painting. See the image below.

Step 11:
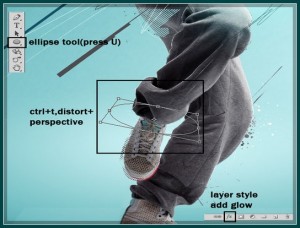
Create a new layer above the abstract line layer and name this layer ring leg. Use Ellipse Tool (U), click in your document hold Shift and draw a perfect circle, then press (ctrl+t) and distort/perspective a little bit, position the circle on the leg of the model. In the layers palette click in the FX icon to add a layer style. Now just follow the settings below to add a outer glow. Use yellow (fcf163). Now duplicate this layer, done.
Step 12:
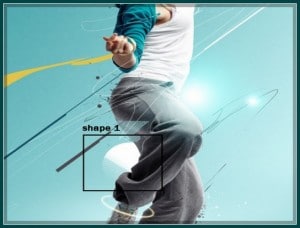
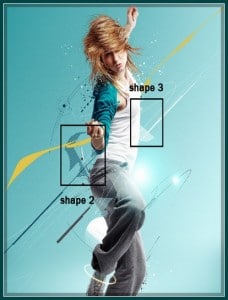
I created my own shapes for this step. You can use mine or create your own shapes. Download my shapes . Create another layer below you main image and (U) with the Custom Shape tool selected start drawing your shapes in the document. Do not forget to take a color swatch to blend with the model. You can see in the picture below where I positioned my shapes to guide you better.
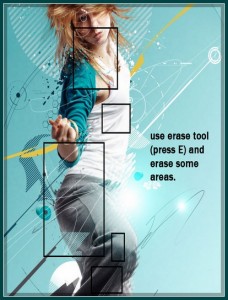
Also you can use Elliptical Marquee too, hold Shift and drag a circle, then click with right button and select stroke. Use 3px or 4px and after this (press E) and select Erase tool. Now erase some areas of your circle as in the image below.
Step 13:
You can create another layer below the model and download some tech brushes set. I used this pack , use the brush wherever you want on your image.
Step 14:
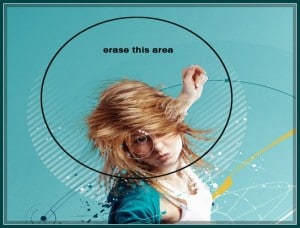
More one layer below the model. Now name this layer big circle. Use one of the shapes I created the position behind the head model. Use the eraser tool with low opacity and erase a part of the circle as shown below.
Step 15:
Create another layer above the model layer. Use the line circle shape i created, hold shift and draw a circle. Place this circle on the main image like the image below.
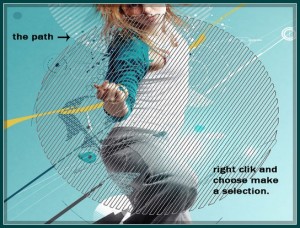
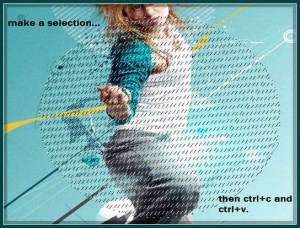
Then right click and choose make a selection. With selection active click in the image layer and (ctrl+c) to copy and (ctrl+v) to paste. Use move tool (V) to move a little bit. Repeat this process in others areas if you wish.
Final Result:
Hope you love this tutorial & find it useful.
We feel really glad if you give us feedback through comment below. Soon we are going to share more interesting & amazing tutorial. So, please stay tuned.
Have a nice day !
Reference : psdbox.com
Pingback:15 Amazing Creative Dance Photo Manipulation Tutorials | GraphicBull
Posted at 10:14h, 15 September[…] to design an advertisement poster or create abstract wallpapers.View Tutorial 4.Create A Root Dance Effect In PhotoshopToday I would […]