09 Nov Extratcting with Channel Mask using Photoshop
![]()
Today I want to show you a useful technique that I usually use in Photoshop to make perfect human selection or extract, which requires the combination of channel mask and the quick selection tool available in Photoshop CS3. Okay let’s get start…
To complete this tutorial, you will need to the following stock image:
Girl
Step 1
Load the Girl stock image into Photoshop. We know the ultimate goal is to separate the girl from the rest of the image, but how do we start. Firstly let’s take a look at the image:
- The overall lighting is quite good and it doesn’t have a lot of color variation.
- This is a human portrait so that means taking out the hairs and making selection around it will be difficult.
- You may think of using Pen Tool, but what happen if you’re just not that good at it??
After those thoughts above, it’s time to get down to business. To begin with, let’s take a look at the channels in the channel palatte and select the “Blue” channel as shown below:
![]()
The reason I chose the “Blue” channel here is because it provide the biggest contrast from the model to the background, comparing with the Red and Green channel.
![]()
Step 2
Now we’re on the blue channel. The second thing we’re going to do is to increase the contrast as much as we can, while preserving the hair bits. To do this, we can make a duplication of the “Blue” Channel by right-click and choose “Duplicate channel”.
On the “Blue Copy” channel, go to Image > Adjustment > Brightness /Contrast and apply the following settings:
![]()
Then hit Ctrl + L and bring up the level adjustments tool, apply the following settings:
![]()
And you will have the following effect:
![]()
Step 3
Now we will have to use the power of the Quick Selection tool to select the light color part of the girl’s body. To do this, simply grab the Quick Selection tool (W) from the tool box, set the brush size to 2px and tick “Auto-Enhance” option, make a selection of the white part as shown below:
![]()
Hint: make use the + and – quick selection tool available on the option bar for adjustments, don’t worry about the hair bits on the outside as they’re already in black color.
When you finish the selection, simply fill it with black color:
![]()
De-select the image when you’re done, if you see a white gap on the girl body, simply use a black brush to fill it.
Step 4
Now you will see around the girl’s body (which is in Black), there are some areas cover in dark grey color. We must get rid of them in order to make our selection better. To do this, simply use the Quick Selection Tool to make a selection around the girl, then press Ctrl + Shift + I and inverse this selection. Grab the Eraser Tool to gently erase those dark gray bits off:
![]()
The reason we make the selection is that by doing so, we will not accidentally erase the parts on the girl’s body.
Here is the effect so far:
![]()
Now we have successfully completed a Channel Mask, which we
Step 5
Now we can go back to the layer palatte, go to select > load selection and choose the following:
![]()
And you will see now the model is selected:
![]()
Press Ctrl + J and make a duplication of the selection, and create a new layer in between and fill it with white color, you will see we have now successfully made a pretty good selection for the girl model:
![]()
Step 6
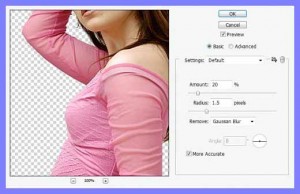
Now we can of course fine tune the image a bit by using the Sharpen Filter. Go to Filter > Sharpen > Smart Sharpen and apply the following settings:

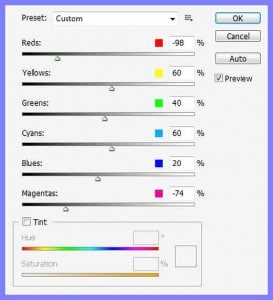
Also add a series of adjustment layers on top of it will help to bring out extra light and contrast: (Go to Layer > Adjustment Layer)
For all adjustment layers, make sure to tick the “Use previous layer as clipping mask” option.
Black and White

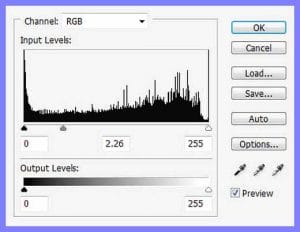
Levels

Curves
![]()
Hue and Saturation
![]()
And here is the effect so far:
![]()
Step 7
Now we have a perfect girl image, without any background and great to work on as a starting point. It’s time to use your imagination and creativity. I simply use some custom brushsets from qbrushes.com and add some patterns in the background, adjusted the color balance a bit.
![]()
Hope you enjoy it and find it useful, drop me a comment if you have any suggestion. Have a nice day!
Credit: psdvault.com
Sorry, the comment form is closed at this time.