02 Apr How to Design with Clipping Masks and Layer Masks in Photoshop

Today i would like to share how to design with clipping masks and layer masks in Photoshop. In this tutorial we are going to compare the Photoshop’s primary masking techniques – clipping masks and layer masks in practical level. We know that a lot of people find the clipping mask to be something of a mind screw, but we try to make this simple and painless. So, let’s have a try…
About Masks:
First, let’s establish a working definition of what a mask is. Basically, a mask is an entity which controls the behavior of a collection of pixels. Generally speaking, this control centers around the relative transparency or opacity of a given layer or group of layers. Wherever a mask is active or “on”, a pixel becomes transparent. Where a mask is inactive or “off”, a pixel remains opaque. Moreover, a mask can be either active or inactive to varying degrees, allowing for a wide range of transparencies.
When combined with Photoshop’s ability to stack different layers, masks become an incredibly powerful tool, which helps grant a designer or digital artist with extremely precise control over the interaction between the different layers. For example, let’s take this beautiful image that I picked up at Dreams time.

Now supposed we want to extract the woman from the background. To accomplish this, we can start by using any one of a number of different extraction methods (in this case, I used channels, which is another article all on its own). However, instead of destructively and wantonly deleting the unwanted pixels, I simply hid them with a mask.

The missing pixels aren’t actually gone. I’ve just made them invisible. Now, I can place the woman onto a completely different background, which I created using textures from a couple of my own texture packs, which you can check out here and here.

The Layer Mask:
A Layer Mask is a one-to-one masking technique, by which I mean that a single mask is applied to a single layer. It’s possible to replicate a layer mask and apply copies to other layers, but each layer ultimately still has its own mask.
Layer masks also exist strictly as masks, and serve no other explicit purpose. They are a way to control the transparency and opacity of a single layer, but they don’t do much beyond that.
To create a Layer Mask, open up the layers palette and select the layer that you want to work on. Then, click on the mask button ( ![]() ) to create a new, blank mask. If you do this with an active selection, the selected pixels will be set to visible while the unselected pixels will be set to transparent. Any partially selected pixels will become transparent in direct relation to the degree of their selection.
) to create a new, blank mask. If you do this with an active selection, the selected pixels will be set to visible while the unselected pixels will be set to transparent. Any partially selected pixels will become transparent in direct relation to the degree of their selection.
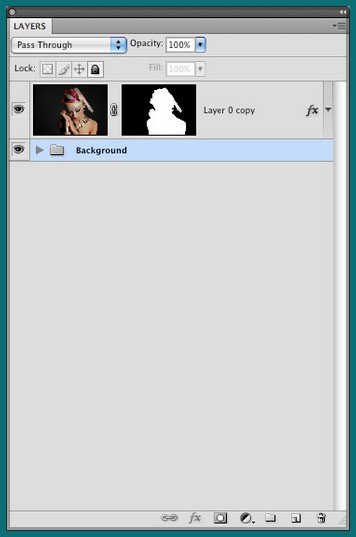
In our previous example – extracting the woman from the dark background – I used a layer mask. Here is a screen shot of my layers palette.

Notice how the black and white layer mask thumbnail appears beside the layer thumbnail (or icon, if you have your palette set to display icons). This is an excellent visual representation of how the Layer Mask is actually attached directly to the layer itself.
This preview also gives you some useful functionality, which I thought I might let you in on while we’re on the subject. Try Command-clicking (PC: Ctrl-click) it to create a new selection based on the mask, similar to the way you would create a selection from a channel. You can also Shift-click the preview to quickly turn the mask on or off and Option-click (PC: Alt-click) to toggle between preview mode and the mask mode, in which you can actually see and edit the mask itself rather than the active preview of its effect.
The Clipping Mask:
The Clipping Mask, on the other hand, is an entirely different sort of beast. Where we can think of the Layer Mask as functioning as a one-to-one type entity, the Clipping mask functions more as a one-to-many type entity, in that it can actually effect multiple layers at the same time.
A clipping mask is also, by its very nature, multi-purposed. While a Layer Mask exists as a modification to a layer, a clipping mask actually is a layer, which interacts with one or more of the layers directly above it. This has some interesting “stacking” implications, which we will get to in a bit.
Personally, I still find creating a clipping mask kind of counter-intuitive. First, select the layer that you want to have masked. If you want to have multiple layers masked, select the desired layers (they must all be in direct sequence). Right click and select Create Clipping Mask from the contextual menu, and watch what happens.
The selected layers all appear indented and are masked by the first layer immediately beneath them. Maybe it’s just me, but this seems awfully quirky. I always want to create the mask by clicking on the layer that I want to become the mask (which is the first layer beneath the indents), even though I understand why that would be programmatically problematic. Still, I have gotten used to the functionality over time.
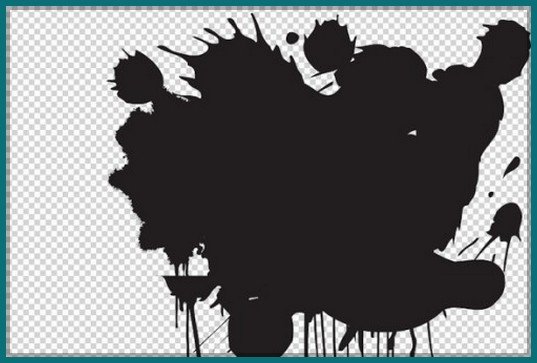
Here’s a practical example. Suppose we want to “insert” the full photograph into a vector frame. The easiest way to do this in Photoshop is to fake it, using a clipping mask! First, open up your vector file and import it into Photoshop. There are a number of ways of doing this, but I usually choose to import it as a Smart Object. I chose to use an ink splatter vector shape. I combined several different shapes from Franz Ghori’s Spray Paints, (which I downloaded from Vecteezy) to create this splatter.

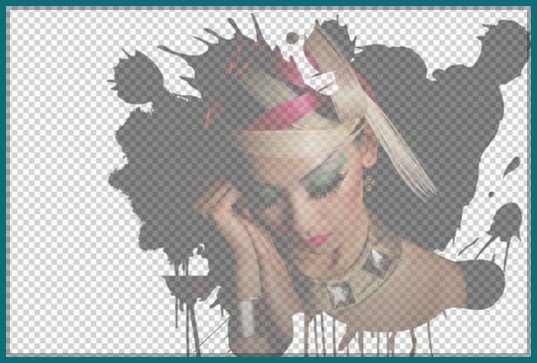
With this shape inside of the document, I can simply activate my photograph and drag it directly above my new shape layer. Then, I simply right click and create a clipping mask. Immediately, my photograph is cropped to the masking shape!

It really is that easy. Now, if I wanted to, I could select and move either the photograph itself or the clipping shape, and the mask would be update immediately. In fact you can actually see the masking change as you make alterations to either of these two layers.
Pixel Controls:
One of the key differences that I want to focus on is the way that the masks actually work, by which I essentially mean the way in which they they control the transparency of the masked pixels. It’s important to understand the difference here, since it will have an impact on the way that you create your masks.
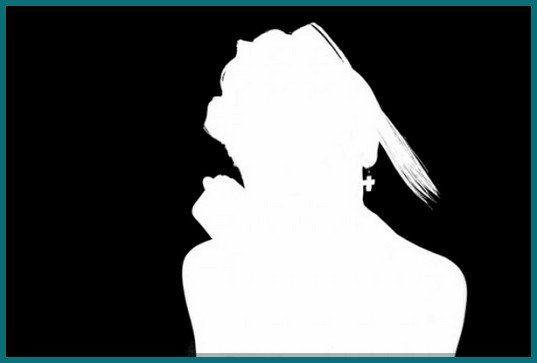
The Layer Mask is based entirely on a greyscale image. In a sense, the Layer Mask is a greyscale image, which is superimposed over the actual pixels of the layer itself, and used to calculate the effects of the mask. The relative blackness or whiteness is what controls the behavior of the pixels. Wherever a pixel in the mask is black the corresponding pixel in the layer is set to transparent. Conversely, wherever a pixel in the mask is white, the corresponding pixel is set to opaque (or solid).
Here is the greyscale mask that I used to extract the woman from the background:

Clipping masks, on the other hand, work more upon an inheritance model. All of the layers effected by the Clipping Mask actually inherit the transparency values of the clipping layer itself. This means that a completely white layer and a completely black layer would have the same effect if used as clipping masks.
So, let’s assume that we want our ink splatter woman to be about 75% transparency. With a layer mask we could do this by using a lighter grey color. To achieve this with our clipping mask, we can just adjust the transparency of our shape. If we take it down to 75%, our masked image automatically inherits the same properties.

The Layer Stack:
There’s probably some sort of official and technical term that I am unaware of, but one of the other differences between Layer Masks and Clipping masks is something I like to call “stacking”, or the way in which the layers fall on top of each other. We’ve already discussed the way the Layer Mask works almost as part of the layer, and how the Clipping Mask is actually a layer which works to mask one or more of the layers directly above it.
But what does this mean, in practical terms?
Well, think of it this way – because the Layer Mask is actually attached to the layer itself, it exists outside of the layer stack (in other words, the order of the layers). When you move a layer, the mask moves with it, just as you might expect.
Not so with a Clipping Mask. In fact, this tool is actually dependent on the stack, because it involves one layer directly affecting another in direct proximity. Changing the order of the layers in the stack not only effects their interactions through transparencies and blending modes, it can actually have a significant effect on the Clipping Mask – adding to it, subtracting from it, or in some cases completely undoing it.
For example, it’s important to be aware that, if you duplicate the layer that is doing the clipping, the mask will actually be dissolved. It’s not really a huge deal, since a clipping mask can just be reestablished, but it can be a bit starling and annoying if it happens when you’re not expecting it.
Combining Them:
It’s also important to note that clipping masks and layer masks don’t have an either/or kind of relationship, in which you would have to choose one or the other. They are perfectly capable of playing very nicely together, which can allow you to achieve some really great effects!
To illustrate this, let’s try combining the two different examples that we have been looking at throughout this article. Let’s suppose we still want our woman to be framed in our ink splatter, but that we also want to remove the dark background from the photograph and replace it with a nice, rich pink color to match the thick streaks in her hair.
The first step is to use a layer mask to extract the woman, just as we’ve already discussed. Once we have the background removed, add in a new color fill layer, and sample the color from her hair. I prefer working with fill layers, rather than just using the paint bucket to just fill a normal layer with color. This way, I can always go back and easily change the color later.

Next, we need to position our ink splatter under our other two layers. Then, with the photo layer and fill layer selected, we just right click and create a clipping mask. Both layers will be clipped by the shape and, after adding in our textured background, we have something like this:

Both the clipping mask and layer mask are integral to achieving this effect, each performing a different role. This just goes to show how easy it is to make them work together! Now, just for fun, we’ll just refine the design with a bit of extra work in Photoshop.
Final Result:

Hope you can learn something new from this tutorial.
I feel really glad if you give me feedback through comment below. Soon i am going to show more interesting & innovative tutorials so please keep visit our blog. That’s for now.
Have fun!
Reference: blog.echoenduring.com

Sorry, the comment form is closed at this time.